
My Local Agentic, Worktree-Oriented Expo Dev Setup
The problem with single-branch AI-assisted development
A couple of months ago I transitioned into the world of mobile app development with the Expo framework and React Native. Around the same time, agentic development took off, accompanied by its challenges.
Arguably the biggest shift in our workflow in the recent months was, simply put: less time writing, more time waiting. Like many of us, I found myself thinking about how to better make use of that time. The logical response was spinning up another agent in another terminal window to work in parallel. Running one or two additional agents in the same branch that was all fun, until you needed to play minesweeper when picking the files you actually wanted to commit. Sure, you probably don't commit manually anymore now, but clean separation is still nice.
Git worktrees solve this cleanly, putting each agent to work in its own worktree; and not just for agentic dev, when you need to do that one unrelated change, you can make great use of them. This post was a useful starting point: matklad: How I Use Git Worktrees
Also, we'll want to see the running app our agent is currently working on. Xcode's command line utilities make it easy to create (and also delete) a new simulator, even with a custom name. Then we can target this simulator to be used for the installation, running the app and connecting it to the dev server running in the agent's worktree.
How the worktree + simulator workflow works
- Create a stable worktree with
git worktree add ../worktree-alpha -b my-first-feature: The worktree intentionally isn't named after the feature you implement first, but gets a generic name, keeping it stable and reusable across feature implementation cycles. - Set target device and runtime in
./sim-config.sh(sourced by other scripts, never run directly):
# sim-config.sh
DEVICE_TYPE="com.apple.CoreSimulator.SimDeviceType.iPhone-16"
RUNTIME="com.apple.CoreSimulator.SimRuntime.iOS-26-2"
Those values can be found by running those two commands:
xcrun simctl list devicetypes
xcrun simctl list runtimes
- Run
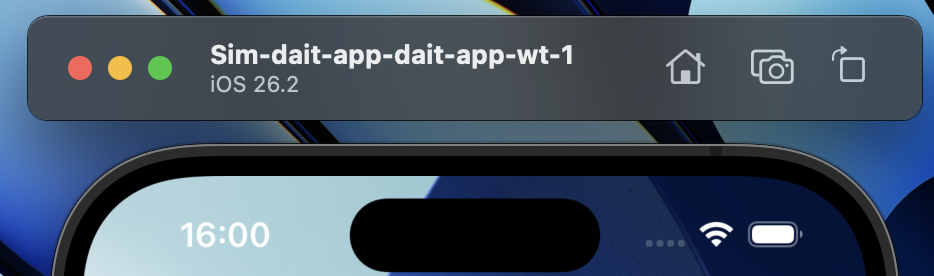
./sim-init-lite.shto create this worktree's simulator. Internally,xcrun simctl create "$SIM_NAME" "$DEVICE_TYPE" "$RUNTIME"creates the simulator and derives the name from the repo+worktree directory. This way, we can recognize at a glance via the simulator's window name which worktree it belongs to.
Most importantly, the UDID of the generated simulator is written to .env.simulator, which should be added to .gitignore.
# .env.simulator
SIM_UDID=F4C82AF4-7E28-4587-9E3D-C0764A4E922D
SIM_NAME=Sim-HelloWorldApp-worktree-alpha
REPO_NAME=HelloWorldApp
WORKTREE_DIR_NAME=worktree-alpha
- Run
./sim-boot-lite.sh: runsxcrun simctl boot "$SIM_UDID"thenopen -a Simulator(note to self: I still need to figure out how to open to a specific window; look at: StackOverflow, StackOverflow 2. - Load
$SIM_UDIDinto the current shell usingsource .env.simulator, then run the dev server targeting the worktree's simulator withbunx expo run:ios --device "$SIM_UDID"(prior to expo-cli 55.0.24 this required a workaround; fixed in this expo-cli PR 🎉). - Let your agent (and yourself) work on a feature in the current worktree.
- Switch to a new branch using
git switch -c next-feature mainonce you are done with a feature - and continue working with the app still running in the same simulator instance. Only if native code changed relative to main, the app needs to be recompiled.
Idling and removing a worktree + its simulator
To idle a worktree: Execute ./sim-stop-lite.sh. Like sim-boot-lite.sh, it automatically picks the worktree's associated simulator instance and shuts it down. Whenever you need it again, run ./sim-boot-lite.sh and it's back up.
Remove the worktree by first stopping and deleting the simulator with ./sim-stop-lite.sh --delete (executes xcrun simctl delete "$SIM_UDID" and deletes .env.simulator). Afterwards a manual git worktree remove ../worktree-alpha, and you're done.
A full session could look like this:
# in the checked out repo
git worktree add ../worktree-alpha -b my-first-feature
cd ../worktree-alpha
# if necessary, edit scripts/sim-config.sh
./scripts/sim-init-lite.sh
./scripts/sim-boot-lite.sh
source .env.simulator
bunx expo run:ios --device "$SIM_UDID"
# work + commit
git switch -c next-feature main
# continue in same simulator
./scripts/sim-stop-lite.sh          # idle
./scripts/sim-stop-lite.sh --delete # final cleanup
cd ..
git worktree remove ../worktree-alpha
One last thing on worktrees
One last thing I discovered on worktrees: You can smoothly advance smaller improvements in a worktree while at the same time a bigger feature progresses in a separate worktree without the feature branch falling behind. A git rebase main in the big feature branch immediately brings it up to date with what landed on main without requiring a git push + git pull roundtrip.
That wraps up how I (roughly) work with multiple agents using multiple simulators locally. In the future I want to wire up agent-device to have the agents also control the simulator and be quite autonomous when UI testing. And let's see what comes up next...